All Organic Micro-Greens by MI-Grow
We eat micro-greens every single day and have been getting requests to share the recipes we use. I hope one day I can create a medium that allows you, our members, to share recipes easily with the community. Until then, we are going to start releasing my personal recipes and usage. Everything from simple to complex.
Our first recipe is usually considered a comfort food but with our product we turn it into…
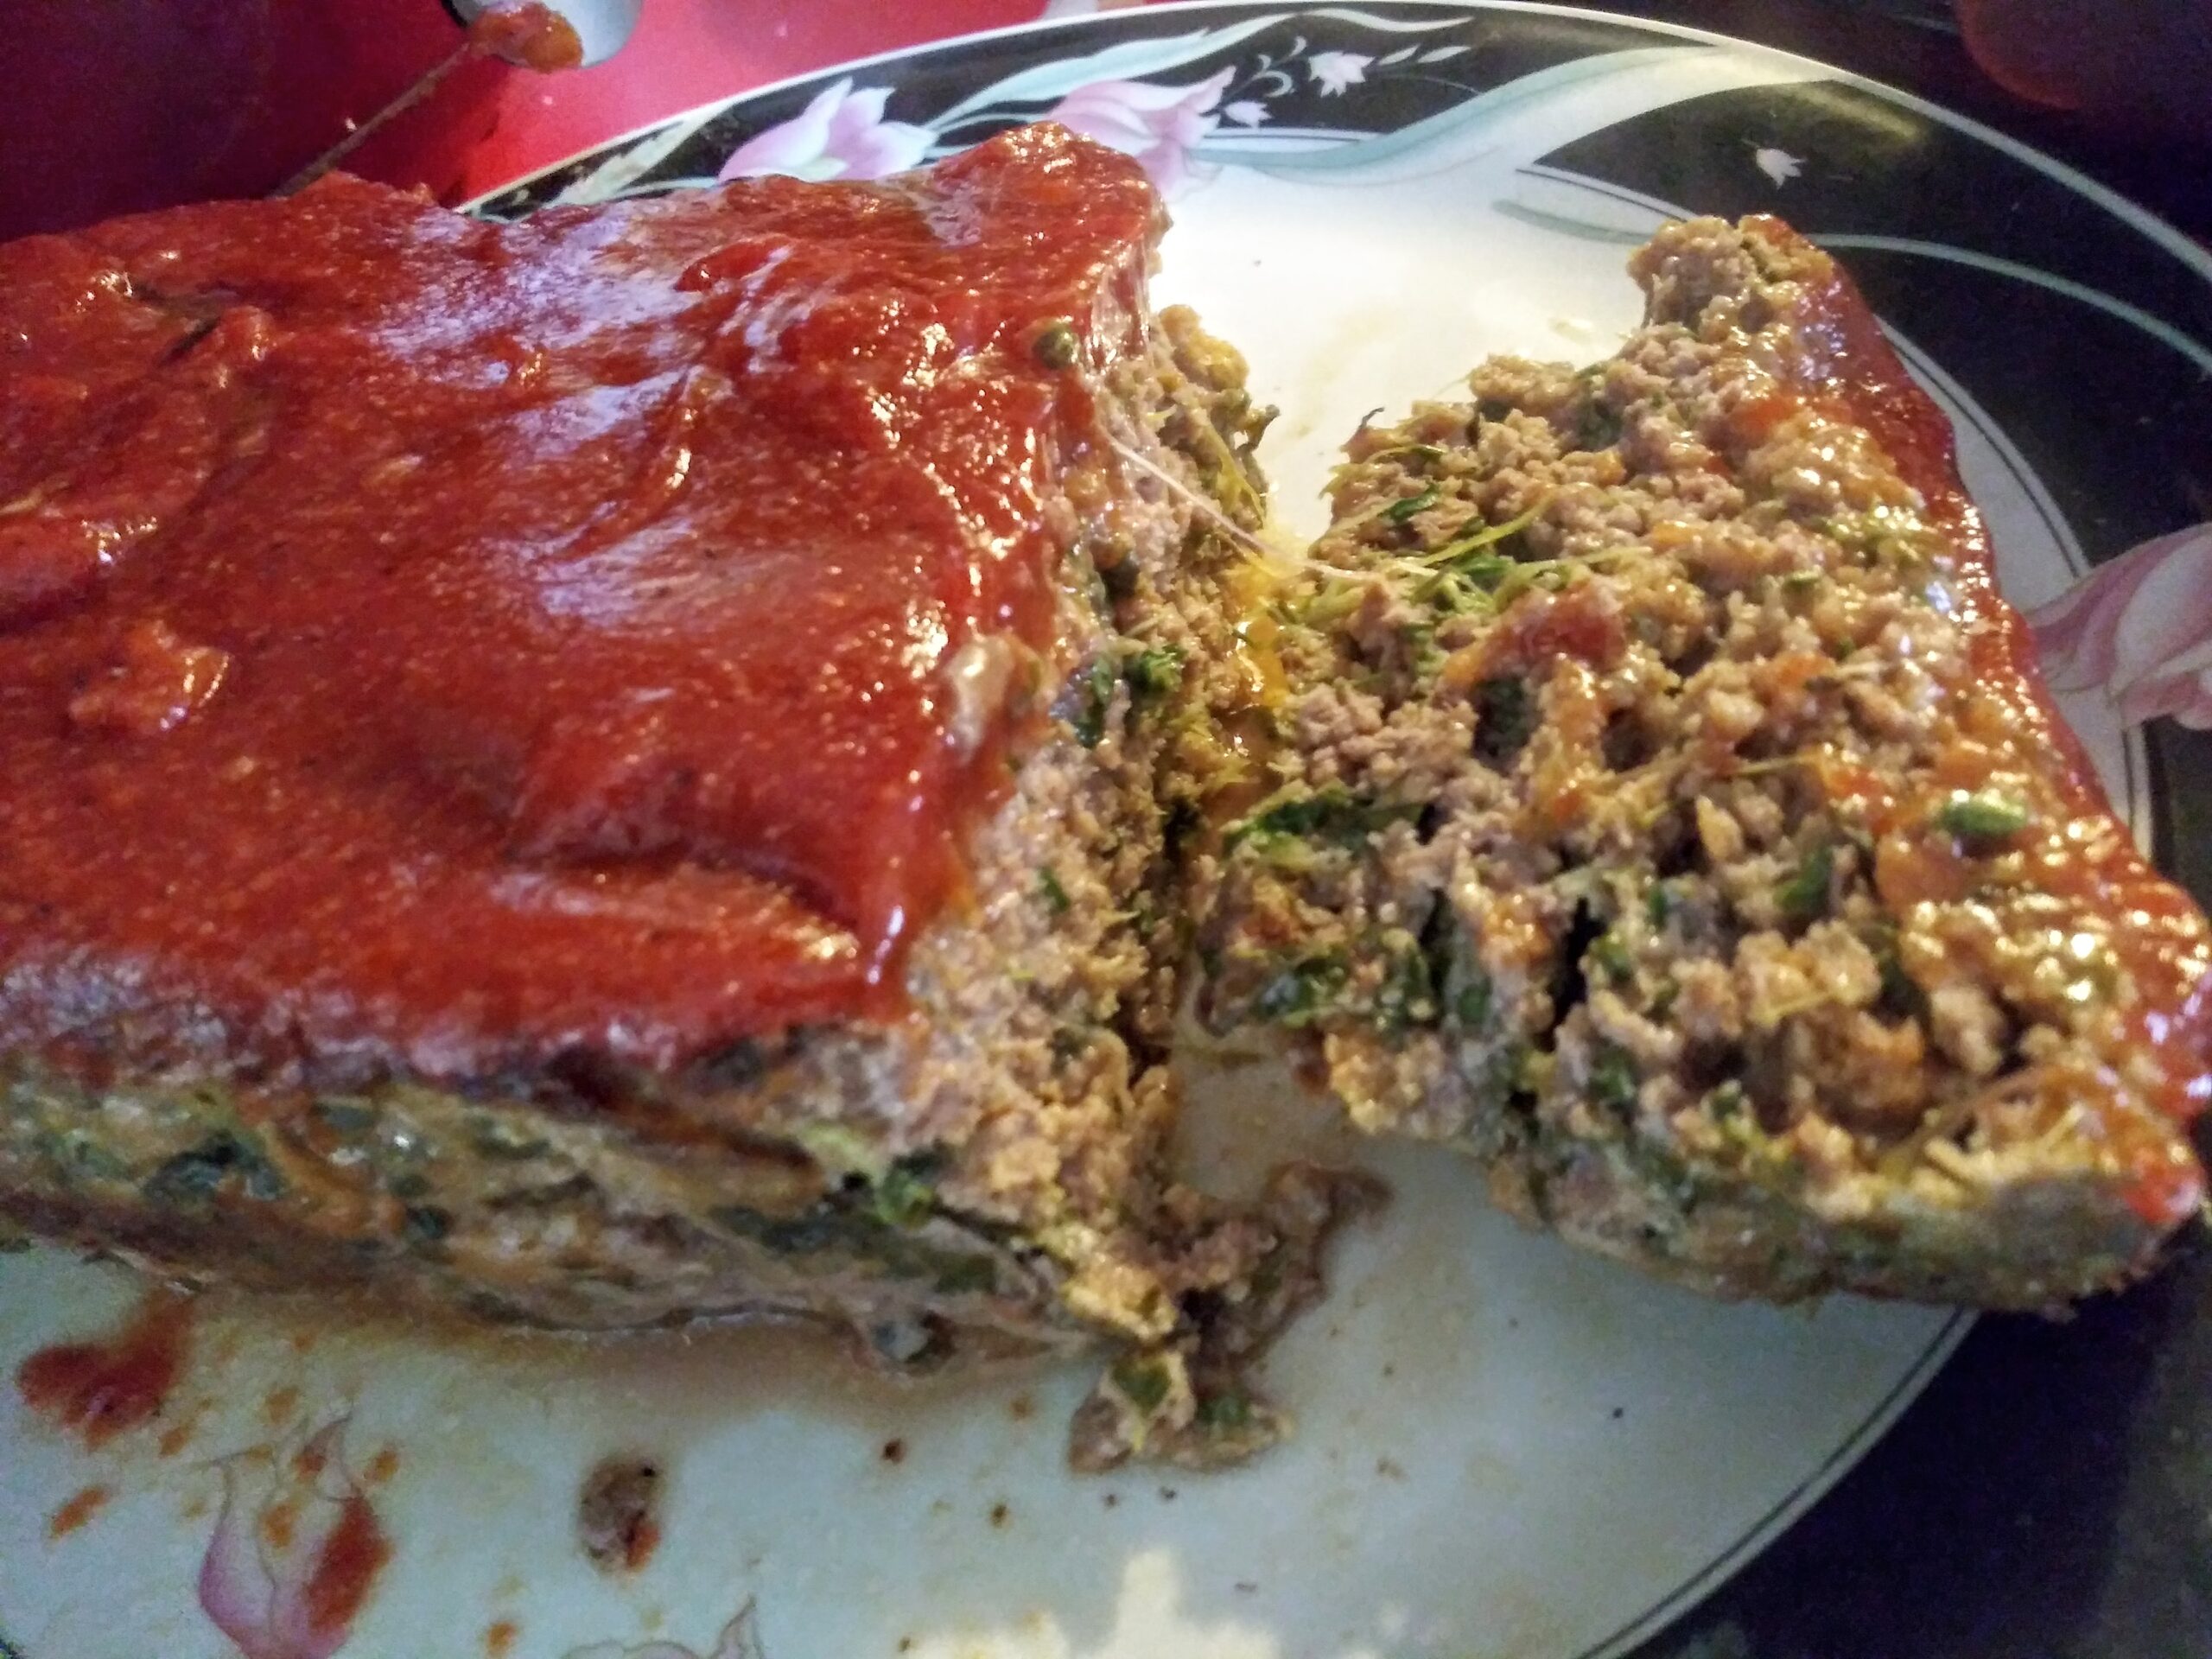
MIGHTY MI-GROW MEATLOAF!
What you need!
Micro-greens by MI-Grow
1-1 ½ ounces Kale and/or Broccoli Micro-Greens by MI-Grow, finely chopped
½ to 1 ounces of MI-Grow Rambo Radish Micros, finely chopped.
(INSTEAD of radish you can use other micro-greens like .5 ounce Alfalfa and ¼ tsp pepper and half a small onion, chopped fine )
The rest of the stuff
1.5 to 2lbs of 85% to 90% lean or quality ground turkey.
¾ cup non-seasoned bread crumbs. (can also use Panko though I have never tried it)
2 large eggs
2tsp Italian Seasoning
½ tsp ground paprika
2.5-3 cloves of garlic, minced
3 tbsp ketchup for beef 3.5 tbsp for turkey
1/3 cup milk
1 tsp salt (you can add .5ish more without ruining the dish if you like salt)
Meatloaf Sauce!
¾ cup heaping ketchup
2 tsp white vinegar
2 ½ tbsp brown sugar
½ tsp onion powder
1 tsp garlic powder
¼ tsp black pepper
¼ tsp salt
Where the magic happens!
Lets get your oven firing up to 375 degrees while you line a 9×5 pan with parchment paper so that you have room to work with the paper when you go to pull it out when the MI-Grow Meatloaf is finished.
Sharpen your knife and slice through your MI-Grow Micro-greens. You always want to practice not smashing the greens. Slice them all fine, rotate and repeat. 1 – 2 rotations usually sufficient. Set aside (same with optional onion)
(Any knife can be sharpened easily. The quality of the blade determines the number of times and how long the edge will hold.)
In a large Bowl add the 2 eggs and wisk them slightly, add the meat, garlic, ketchup, milk, salt, Italian Seasoning, paprika, and optional pepper. BARELY mix. If you over mix this your meatloaf will be overly dense! At this point your just getting the ingredients to touch each other. Add breadcrumbs and MI-Grows. Mix JUST enough to get the micro-greens to evenly distribute through. If you do this the rest should too. Do not over mix!
(It will look slightly ridiculous with all green sticking out, trust me it is normal, they cook down, and it will be AMAZING!)
Take the Mighty Meatloaf Mix and shape it to your pan, careful as to only push it as much as needed to even it out and flatten the top. It is ready to go! Set the timer for 40 min and put it in uncovered.
While that is cooking it is time we make our sauce!
It is super easy!! Just put all of the sauce ingredients in a bowl, mix well, cover, and set in your fridge.
Pull the meatloaf out carefully when the timer goes off, lightly spread all the sauce even on the top, put back in for 20 min. (15min if you want the sauce to be less thick on top) Have your serving plate ready, carefully bring your meatloaf out of the pan onto your serving tray and let sit for 10 minutes.
Slice and Enjoy!!!
Bonus tip: You can pour the juices left in the pan onto the meatloaf after slicing for flavor and moisture.
MI-GROW CREAMY CHEESE WONTONS!
What you need!
Micro-greens by MI-Grow
1 ounce of Red Russian Kale, Tuscan Kale, or Red-Streaked Mizuna Micro-greens by MI-GROW
The rest of the stuff
1 pack of wonton wrappers
½ teaspoon sugar
½ teaspoon onion powder
8 ounces cream cheese soften
1 egg, beaten
Enough oil to fry (about 4 inches) or deep fryer on 350
Where the magic happens!
Preheat your oil or deep fryer to 350 degrees
Put egg in a small bowl and whisk. Set aside.
Chop micro-greens by MI-Grow very fine. Set aside.
Combine Cream cheese, onion powder and the sugar. Stir well!
Add desired amount of Micro-greens. 2 to 3 tablespoons. Stir them in.
Place wrapper, 1 teaspoon of the mixture in the center, brush egg around the edges.
Start with 2 opposite corners, bring together and pinch. Do the same for the other 2 corners. You don’t want oil getting in the wrapper. Make sure it is sealed.
Fill and pinch all of the Wontons.
Fry 6 Wontons at a time for about 1 to 2 minutes on each side or until nice and brown. Should take about 3 to 5 min total.
Drain on paper towel and repeat till all fried up.
Grab your favorite dipping sauce and Enjoy!!!

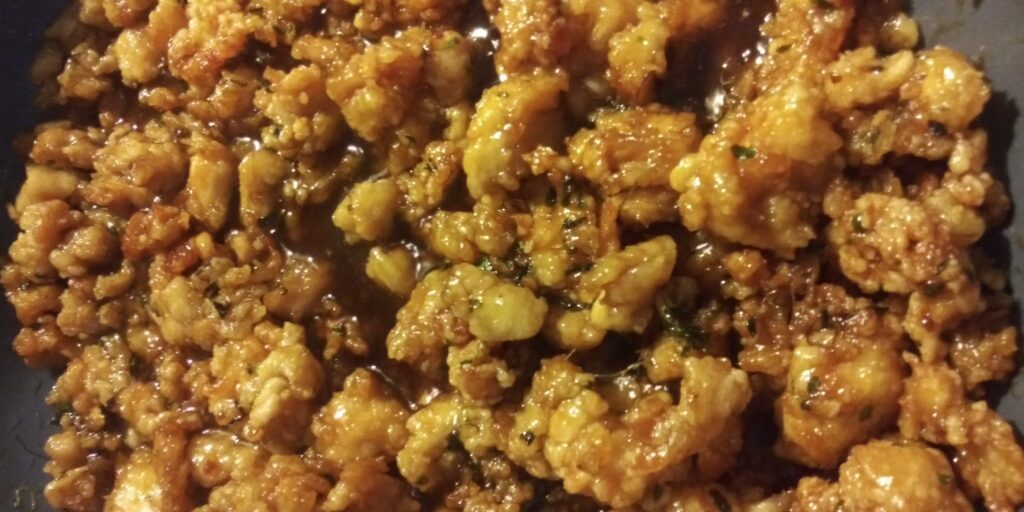
GENERAL MI-GROW CHICKEN!
What you need!
Micro-greens by MI-Grow
½ – ¾ ounce of Alfalfa Micro-greens by MI-GROW
½ – ¾ ounce of Tuscan or Red Russian Kale Micro-greens by MI-GROW
1 ounce of Rambo Radish Micro-greens by MI-GROW
1 ounce of Broccoli Micro-greens by MI-GROW
The rest of the stuff
2 eggs
3 lbs of fresh chicken breasts, cubed into small even pieces
2 tsp salt
2 pinches of white pepper (optional but recommended)
2 cups of cornstarch
4 tbsp spoons of vegetable oil
2 cloves garlic, minced
2 strips of orange zest (you can use 1 tbsp of orange juice instead if you don’t have an oranges or even leave it out entirely, however, it does do quite a bit add balance.)
1 cup and 2 tsp of white sugar
6 tbsp of chicken broth. (best from stock but can use cubes in a pinch)
2 tbsp rice vinegar
½ cup soy. (Not all soy is created equal!! Get 100% soy, you will thank me later)
4 tsp sesame oil
4 tbsp peanut oil
½ tsp ginger, ground
½ cup water
Enough vegetable oil to fry the chicken or a deep fryer. More than enough to cover chicken or use a clean deep fryer set to 350 degrees.
OPTIONAL ¼ – ¾ tsp of cayenne OR 6 to 12 dried chili peppers for heat.
You will need a large pan, with enough oil for deep frying the chicken or a deep fryer about 350 degrees, a wok or another large deep skillet with 4 tbsp oil, 1 large bowel for mixing the chicken, 1 medium bowl for creating the sauce, 3 small containers 2 that can hold a little more than a cup, 1 that holds 4 tsp. A large plate or 2, lined with paper towels, for draining the chicken.
The Prep Work
Start preheating the large amount of oil or deep fryer to 350 degrees .
Take the micro-greens by MI-GROW and chop them up with a sharp knife, set aside.
Mince garlic. Set aside.
Take the large bowel and beat 2 eggs, add cubed chicken, sprinkle 2 tsp of salt, 2 tsp of sugar, and 2 pinches of white pepper. Mix Well.
Add the 2 cups of cornstarch ½ to 1 cup at a time, mix well, keep adding till all gone. Mix hard until it is covering all the chicken pieces completely. Cover and set aside.
In your medium bowel add chicken broth, rice vinegar, soy, sesame oil and peanut oil. Set aside.
In your small containers take one and put 1 cup of sugar and ½ tsp of ground ginger and set aside.
With the remaining containers put ½ cup of water in the larger of the 2 and 4 tsp corn starch in the smaller.
Feng Shui achieved! Now this is where the magic happens!
You should be able to do this in 3 to 4 batches. You fry them 2 times each. The first batch might cook a little faster than the rest so keep an eye on it, Don’t be afraid to turn up the heat as you go if doing it on the stove, keep it at 350.
ROUND 1
Drop 1/3 of the chicken into the oil and use a metal spatula to start break up all the pieces the best that you can, fry for about 3-4 minutes, should look cooked but not very crispy. If it is dark, it is a bit overcooked for this round but that is ok, do a little less in round 2. Put this chicken to one side of your plate and use paper towels to separate the batches or use separate plates. Do this until you go through all the chicken once and have them seperated into batches
ROUND 2
Start with the first batch you did, except this time you only cook 2-3 minutes and rotate till you get to the last one. This is when you begin to preheat the wok on medium to medium low. Finish the chicken and set aside.
THE WOK
Add a piece of test garlic, smallest amount possible. If the temp is right, you should have to cook you garlic for 1 to 2 minutes to achieve that aromatic perfection. If it cooks faster than 1 minute dump the wok and start again. If more than 2 minutes that is fine, you will be turning the heat up soon enough. Scoop out the test piece. If you know your wok or you have done this before, you can skip this step.
Add the garlic. If using chili peppers, add them now or if using cayenne pepper add it when your garlic is almost done, it will starts to change color and taste nutty. You can also smell it change. At the point of the garlic change the zest and quickly stir, do NOT let the zest burn or you will have to start over. Add the MI-Grow Micro-greens and start them wilting a bit. Stir well! Add the medium bowel containing the wet ingredients and the ginger sugar to the mix, Stir well as you Bring the heat up slightly above medium. Continue to stir until the mixture boils. While you are waiting for that to boil, mix the cornstarch and water that you set aside earlier together. Stir well and make sure is fully mixed. Add to the boiling mixture, Stir well, bring back up to boiling for 2 minutes. Stir often. Add chicken, stir till covered, reduce heat and let simmer for about 2 more minutes or until sauce is where you want it careful not to burn the sauce or let it over thicken. Remove from heat.
Serve over white rice and Voila, Nutrient Dense Excellence! ENJOY!!!
Bonus tip:
While you have your oil on, why not think about adding our MI-GROW CREAMY CHEESE WONTONS to your dinner plans. Have these prepped and while you are working on your sauce, let these fry up. Not only will this typically taste better than most take-out, but it is far more nutrient dense with the magic of MI-GROW ORGANIC MICRO-GREENS!
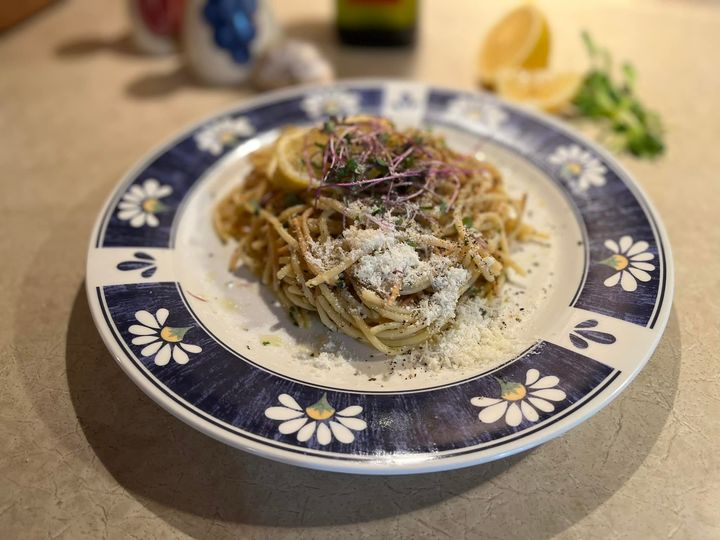
Garlic lemon pasta with Micro-Greens by MI-GROW
Created by Lynn-Ann Belluso
Ingredients
• 1 lbs spaghetti
• 1/2 cup extra virgin olive oil
• 2 tbsp butter
• 1 1/2 tbsp minced garlic
• 1 tbsp lemon zest
• 1/4 cup fresh squeezed lemon juice
• 1 lemon quartered
• 1/4 cup chicken bone broth
• 1 1/2 tsp chopped fresh basil
• 1/2 tsp Himalayan pink salt
• 1/2 tsp freshly ground pepper
• 1 cup chopped Kohlrabi micro-greens by MI-GROW (I substituted the Kohlrabi with 1/2cup of Mizuna and 1/2cup of kohlrabi Micro-greens chopped. Adjust for taste. MI-GROW)
• 1/2 cup broccoli micro-greens by MI-GROW **set aside a pinch of micro-greens for garnish
• 1/2 cup chopped fresh parsley
• freshly grated Parmesan cheese
Instructions
1. Cook spaghetti in a large pot of salted boiling according to package directions.
3. Meanwhile, in small saucepan, heat oil medium-low heat. Add garlic and cook until fragrant, about 1 minute.
5. Stir in butter, lemon zest, lemon juice, chicken bone broth, fresh basil, salt and pepper; raise heat to medium-high.
7. Bring to a gentle boil; reduce to low heat and simmer 3 minutes.
9. Drain pasta, return it to its cooking pot. Pour sauce over pasta, then add arugula, broccoli, and parsley.
11. Use tongs to gently toss the pasta, sauce, and greens together.
12. Transfer pasta to serving bowl.
13. Garnish with freshly grated Parmesan cheese, quartered lemon, and micro-greens by MI-GROW.
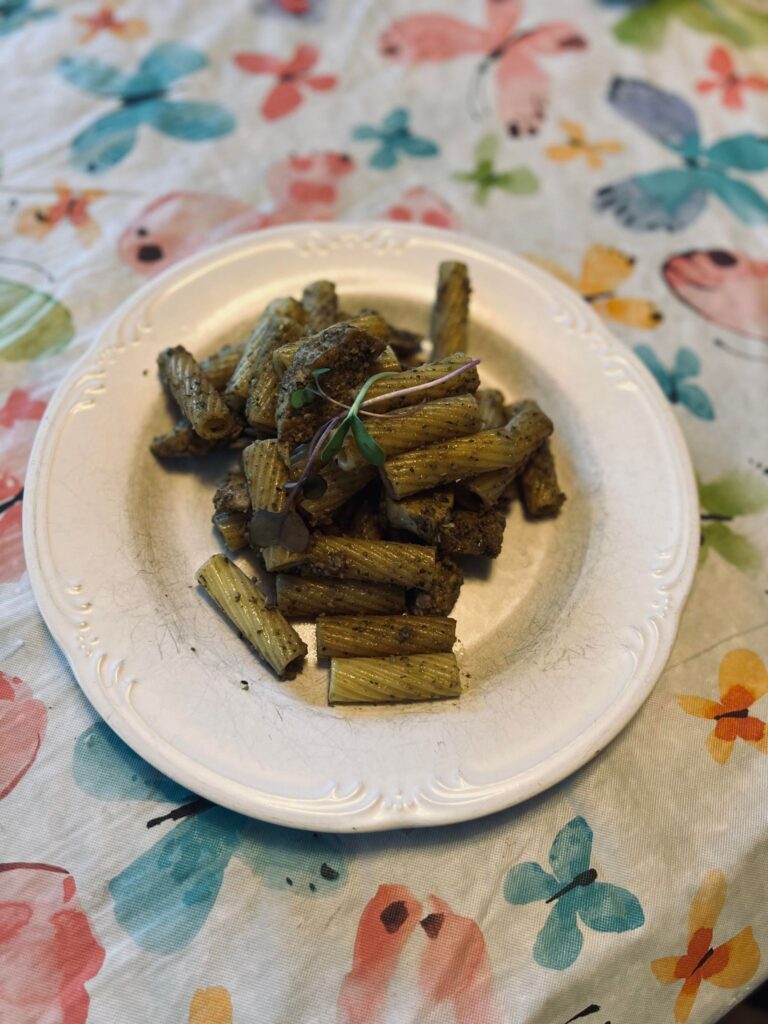
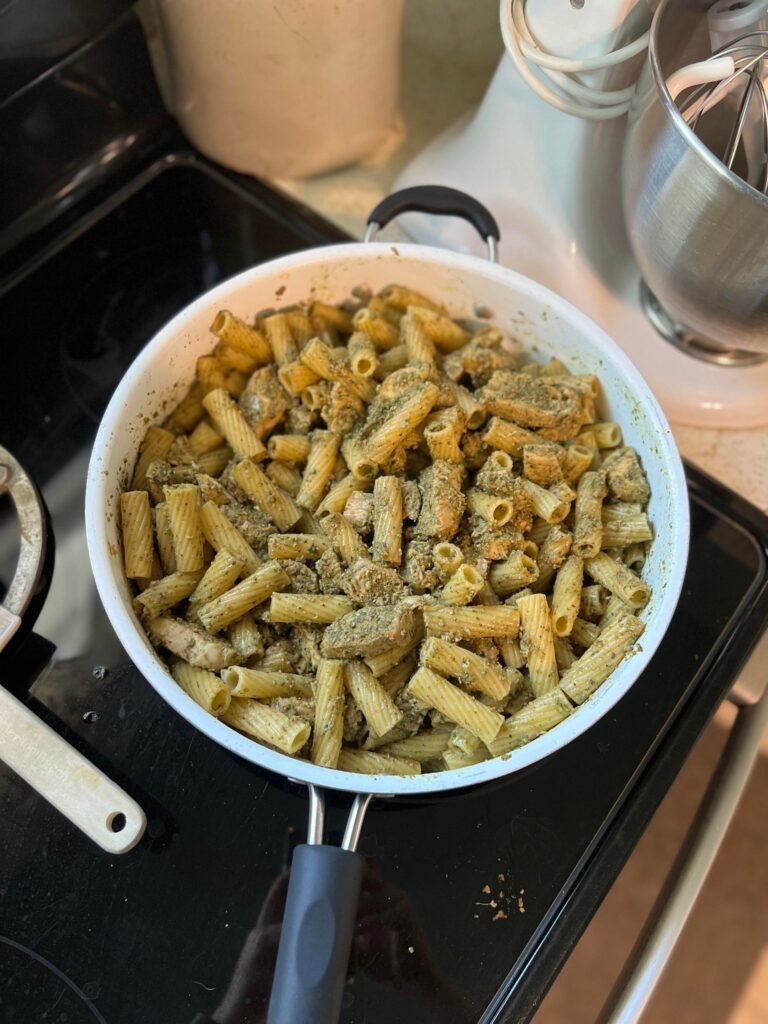
MI-GROW GREEN PESTO
By Chef Emily-Ann Belluso
Ingredients:
1 head of crushed garlic
1 cup fresh basil
3/4 cup pine nuts or sunflower seeds
2 cups assorted Mi-Grow greens
2-3 tablespoons olive oil
2-3 tablespoons lemon juice (or as needed)
Salt and pepper to taste Parmesan cheese (optional)
Blend all ingredients in a blender or food processor until smooth. Add more oil and lemon juice as needed.
Pan sear chicken breasts or thighs in 1 tablespoon olive oil, 2 tablespoons pesto and 1/3 cup chicken broth.
Boil noodles then add to chicken with the pesto sauce and stir to combine
Chemical-Free
No Chemicals ever touch the product you eat. We use climate control and other measure to insure nothing ever touches your product before you do!
Fresh & Healthy
The health benefits for consuming out product are nothing short of amazing! Up to 9 times the nutritional value of their full grown counterparts!
100% Organic
Many companies say they use 100% organic process but they don't use 100% organic seeds! From seed to substrate everything we use is organic certified!
MI-Grow Superfoods
Eating MI-Grows may help with all of these things and more including power anti-cancer and chronic disease fighting properties!
Talk to your Health Care provider and ask about the entourage effect of eating MI-Grow Super-Foods together with other healthy things to help reach maximum utility of the nutrients available to your body.
- Improves Digestion!
- Boosts Immunity!
- Helps with Weight Loss!
- Protects Liver Health
- Improves Brain Health
- Improves Vision
- Increases Libido
- Reduces inflamation
Subscribe To Get Special Offer
SIgn up to get notified for things such as when our crops will be harvested and what has been grown this cycle. Subscribers are also eligible for a discount on new, first time subscriptions!

